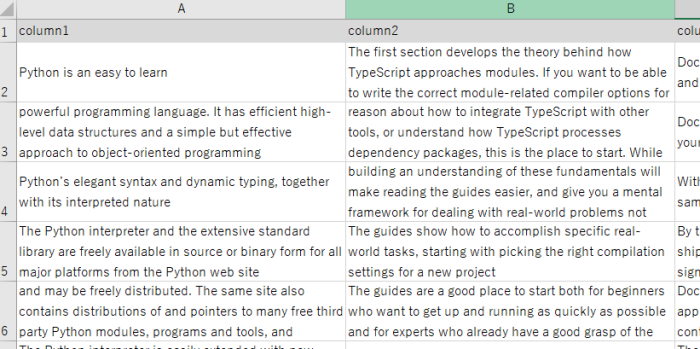
Excelにあるこのようなテキストデータを1列ごとに取得してWordcloudを作成してみます。

ライブラリのインストール
まずはじめにデータ操作のために使うpandasライブラリをインストール。
!pip install pandasWordCloudライブラリをインストール。
!pip install wordcloud自然言語処理(形態素解析)を行うためのNLTKライブラリをインストール。
!pip install nltk※ちなみに英語であればNLTKだけで対応できますが、日本語の場合はMecabなどのライブラリを使う必要があります。
ストップワード(除外すべきワード)について
また、意味のある頻出キーワードをワードクラウド上に出力させるためには、「i」や「you」などのストップワードをテキストデータから除外する必要があります。一般的な英語のストップワードはnltkライブラリで既に用意されており、まず以下のコードでリストアップやダウンロードすることができます。
from nltk.corpus import stopwords
import nltk

nltk.download('stopwords')
stop_words = stopwords.words('english')
print(stop_words)

# 出力結果
['i',
 'me',
 'my',
 'myself',
 'we',
 'our',
 'ours',
 'ourselves',
 'you',
 "you're",
 "you've",
 "you'll",
 "you'd",
 'your',
 ≀
以下省略
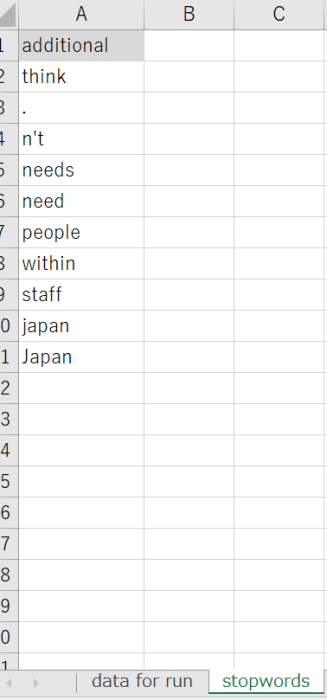
さらに規定ストップワードに、独自のストップワードも必要に応じて以下のようにExcelにどんどん追加していくことができます。

全体のサンプルコード
以下がtext_data.xlsxというExcelファイルのcolumn1という列のワードクラウドを作成する全体のサンプルコードです。
import pandas as pd
from wordcloud import WordCloud
import matplotlib.pyplot as plt
from nltk.tokenize import word_tokenize
from nltk.corpus import stopwords

file_path = 'text_data.xlsx'

#Excelファイルからデータを読み込む (引数:ファイルパス, シート名)
df = pd.read_excel(file_path, 'data for run')
#独自ストップワード用データも読み込む
df2 = pd.read_excel(file_path, 'stopwords') #このコードはもし独自のストップワードを追加したいとき場合のみ記述してください

#文字列データを作成(欠損値(nan)を除外し、文字列に変換)
text_data = ' '.join(df['column1'].dropna().astype(str))

#単語ごとに分割してリスト化
tokens = word_tokenize(text_data)

#除外キーワードの設定
stop_words = set(stopwords.words('english')) #規定stopwords
additional_stop_words_list = df2['additional'].tolist() #任意。stopwordsシートに記載した独自ワード追加分
stop_words.update(additional_stop_words_list)#任意

#Excelの場合「's」のような文頭にシングルコーテを表現できないので直接追加する
s_additional_word = "'s"
stop_words.update({s_additional_word})

#除外キーワードをループで除外
tokens = [word for word in tokens if not word in stop_words]

#wordcloud作成
wordcloud = WordCloud(width=1200, height=800, background_color='white').generate(' '.join(tokens))

plt.figure(figsize=(10, 5))
plt.imshow(wordcloud, interpolation='bilinear')
plt.axis('off')
plt.show(block=False)

input("press enter to exit..")


コメント